This article provides the overview of MachPanel API Test Application & how it works.
Applies to & Supported in MachPanel v5.1.10 and onwards.
Current Version of MachPanel API is v5.12
API Documentation Updated on: 30/06/2014
To better understand and easily deploy the MachPanel API, MachSol has provided a test application alongside the API. This test application demonstrates how to communicate to MachPanel API and perform various tasks.
Test application is written in C# 3.5 using ASP.Net at front end to build a shopping store application. The application used SOAP XML messages to communicate with the API.
Deploying this test application in IIS as simple as creating a new site in IIS and running it from browser. But before you do that, please make the changes suggested below.
Open web.config in any editor and locate following XML block of code. Following XML block in the configuration file demonstrates the configuration settings.
<appSettings>
<add key="CompanyLogin" value="test"/>
<add key="CompanyPassword" value="test"/>
<add key="ServiceUrl" value="http://localhost:8080/WebServices/MachPanelService.asmx"/>
</appSettings>
- CompanyLogin: Value for the Key required to login to MachPanel API.
- CompanyPassword: Value for the password required to authenticate MachPanel API request.
- ServiceUrl: The URL of the MachPanel API to connect to and send and/or receive messages.
The test application has been configured to use web service at address: http://localhost:8080/WebServices/MachPanelService.asmx
As this web reference was added in testing lab for the purpose of testing, so the URL has to be changed. You have to modify it and update according to your installation, like:
http://cp.mydomain.com/WebServices/MachPanelService.asmx
Once above configuration in web.config file is done, run the test application in any browser. Test application is developed to represent an Online shopping store for a service provider and/or reseller. Test application begins with listing the services being offered through MachPanel.
Following snapshot depicts it clearly.
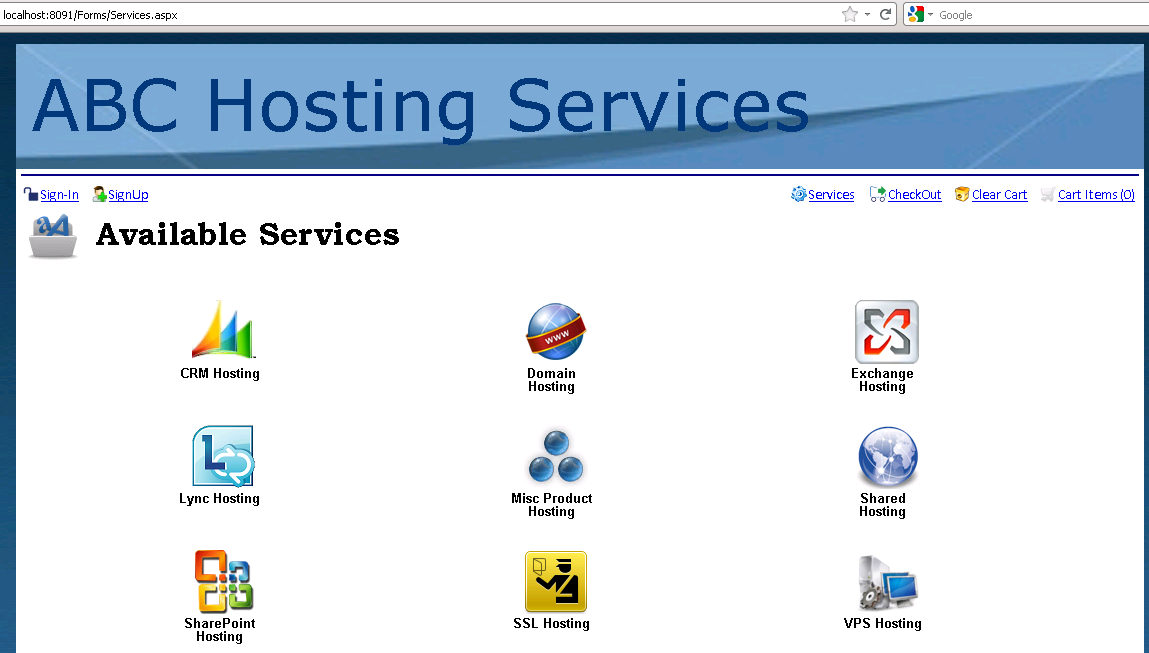
Upon selecting a service from the services interface, list of packages saved against a service under given company account are listed.
Following is a snapshot of service plans of selected service type.
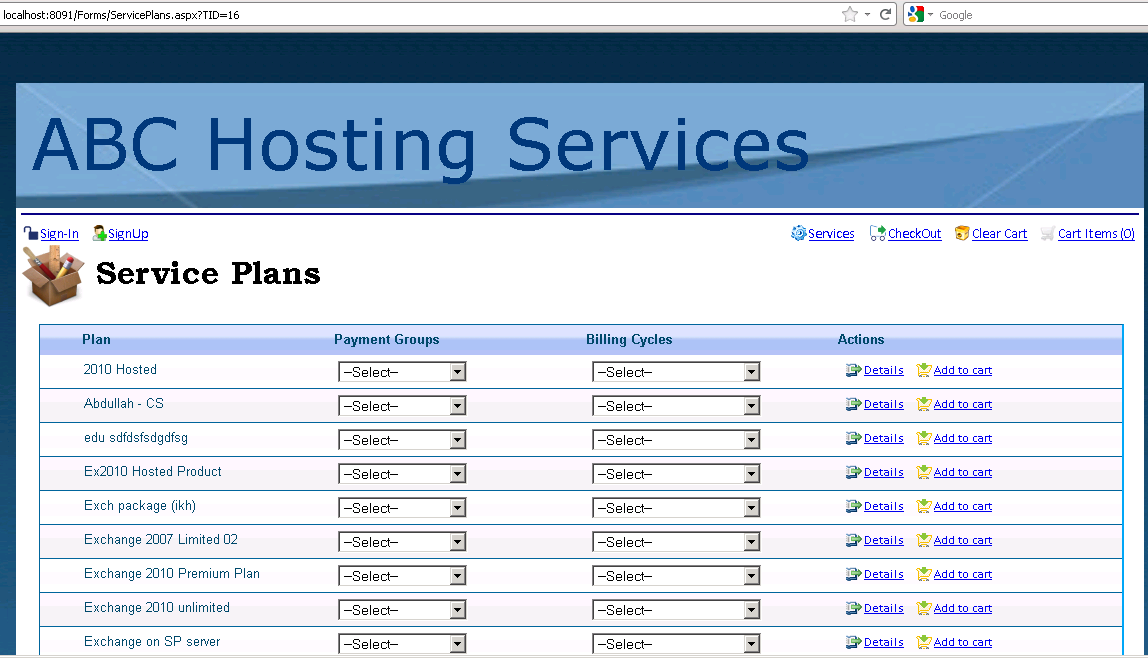
In above snapshot, exchange service was selected and service plans/packages are listed accordingly. In this interface a user can select and add a package to the shopping cart by providing mandatory details. Details for a selected package are shown upon clicking details link and then adding to the cart. Following snapshot shows this evidently.
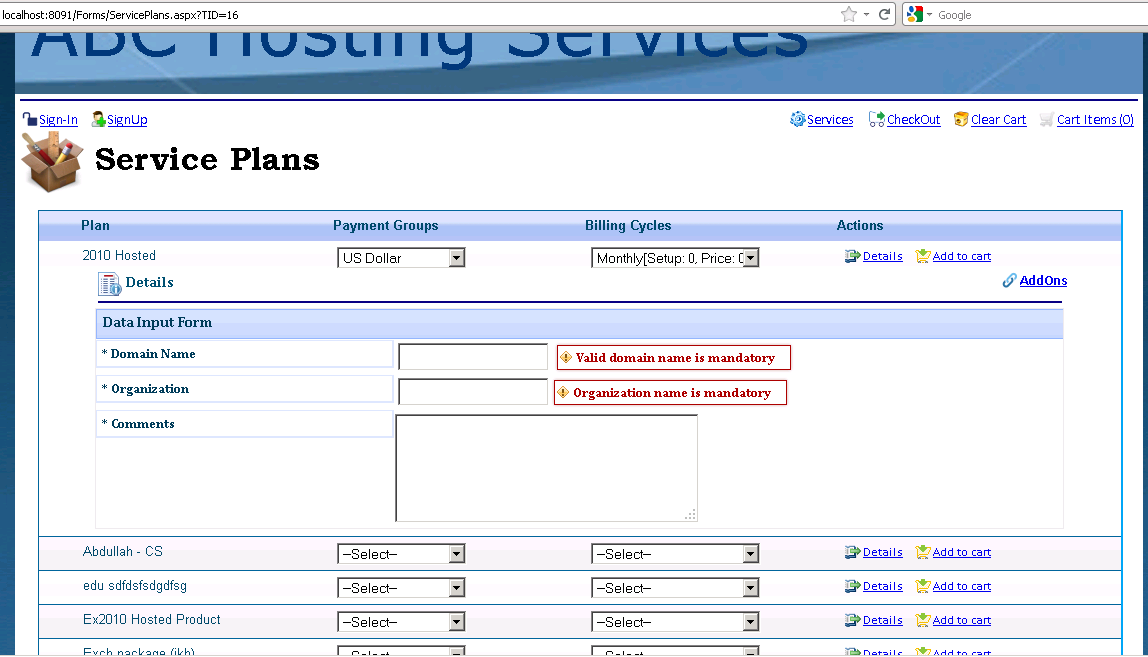
Once a user is completed with providing details of the package, he and/or she can select number of Add-on(s) to associate with current item. For associating an Add-on with a package, user is required to click on Add-ons link button shown in upper right corner of the detail area. By clicking on this button following screen will appear:
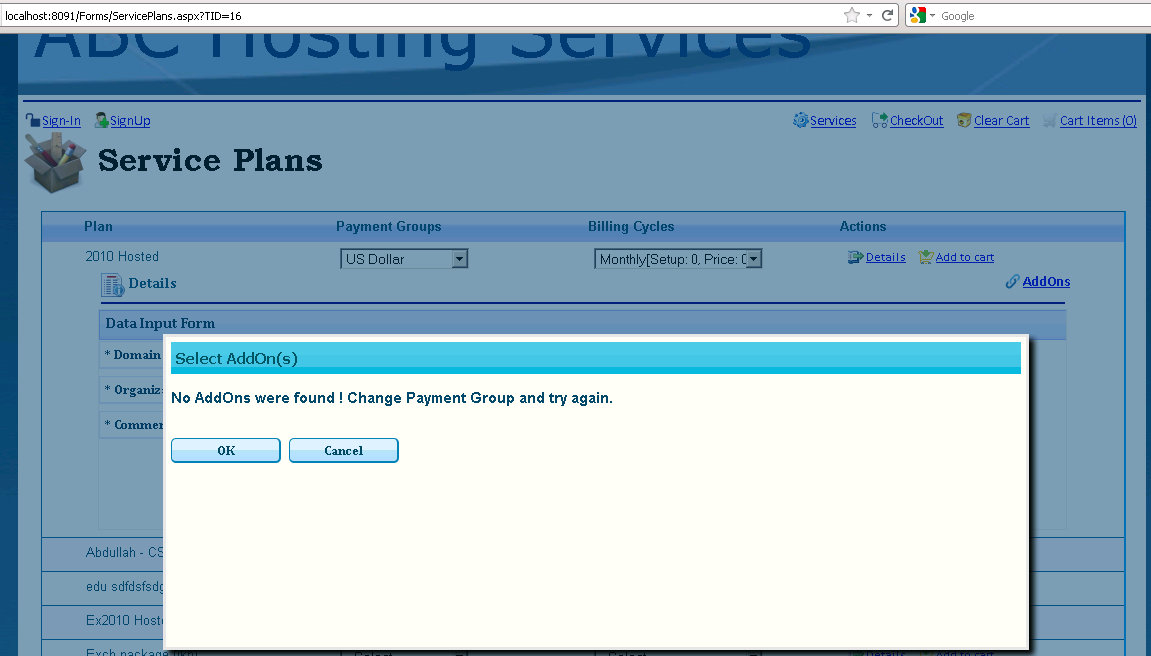
If Add-Ons are not available then above screen will be shown, otherwise the screen will look like below.
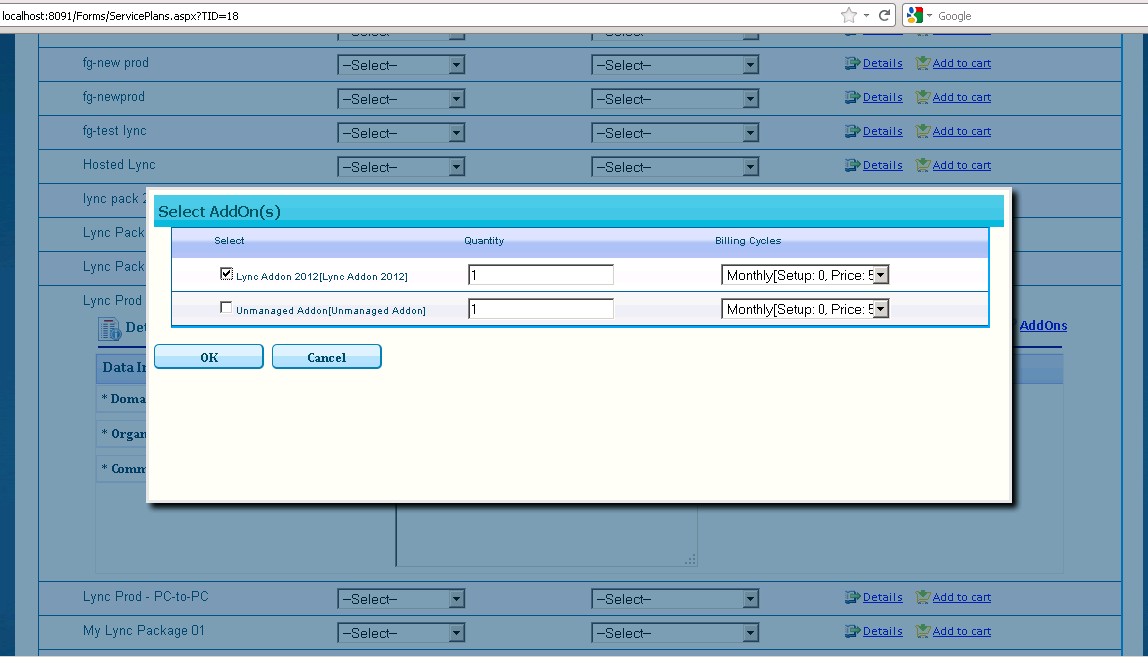
Once details for an item are provided and Add-On associated with the item, user can add this item to the shopping cart. The Upper right corner of the screen has few links such as Cart Items, Clear Cart, CheckOut and Services. By clicking on Cart Items, link user is presented with cart items listing interface. Here user can remove an item from the cart easily and/or remove associated Add-On(s) from the cart.
Following screens show shopping cart listing interfaces.

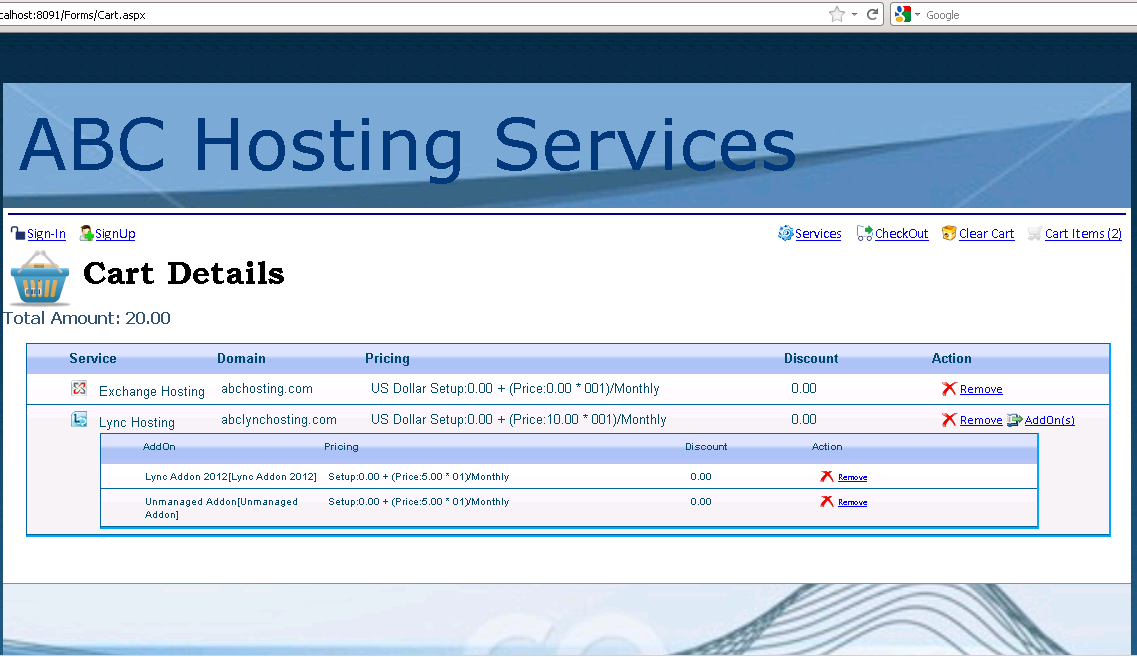
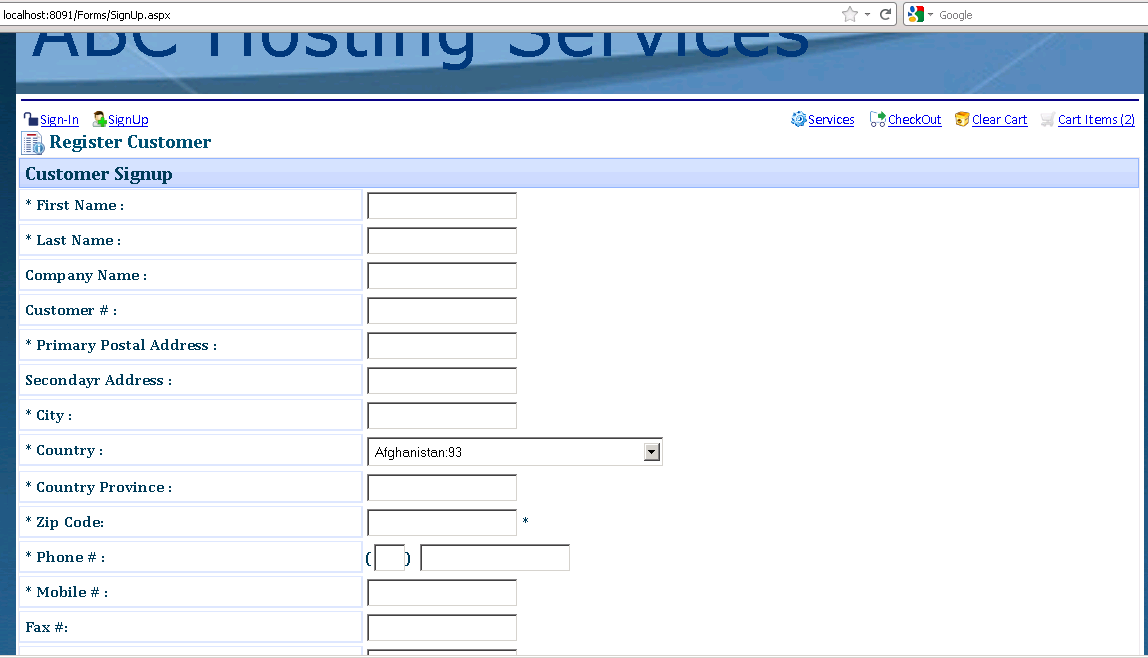
After a user is done with shopping, he/she can check out the items from the cart. For this, a valid MachPanel customer account is needed to check out the items from the cart. If the user has a valid MachPanel account then he/she can easily login to the application and checkout the items, otherwise he/she can sign-up as a new MachPanel customer.
Following screen shows signup form for the end user.
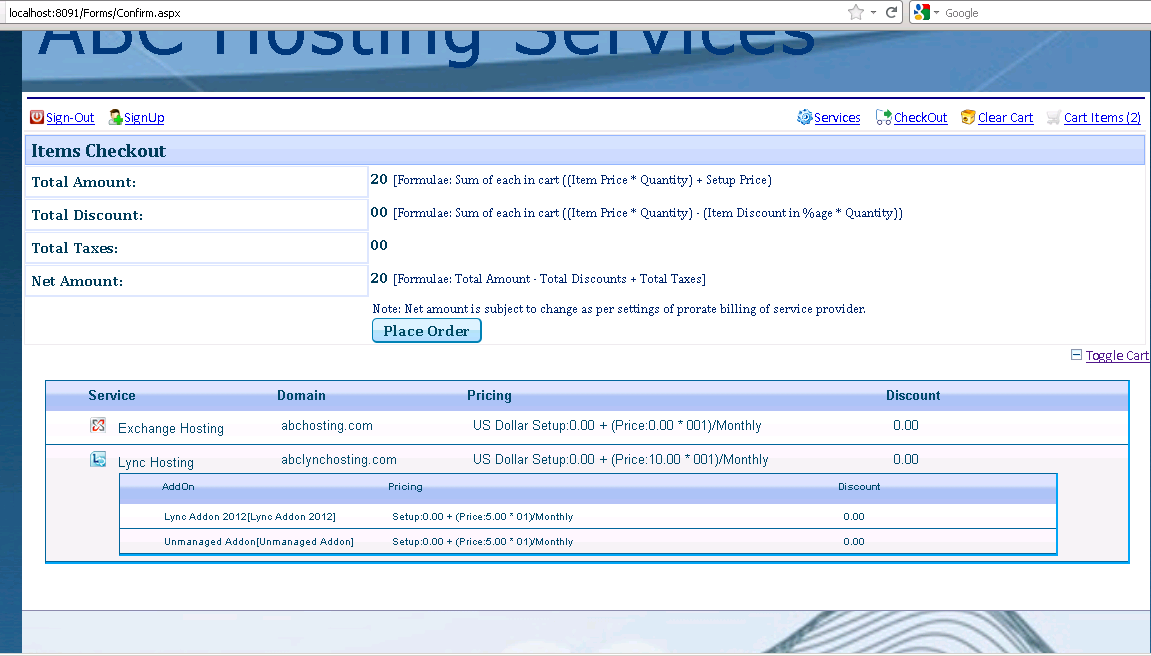
Following screens show checkout interfaces. By clicking on Place Order button the order request is sent to MachPanel Control server and upon successful subscription of the services, end user is redirected to the very first page of the shopping cart.

Following is a sample code snippet to utilize MachPanel API in client application to authenticate a customer:
MPAuthenticationHeader header = new MPAuthenticationHeader();
header.UserName = ConfigurationManager.AppSettings["CompanyLogin
header.UserPassword = ConfigurationManager.AppSettings["CompanyPassword"];
MachPanelService svc = new MachPanelService();
svc.Url = ConfigurationManager.AppSettings["ServiceUrl"];
svc.MPAuthenticationHeaderValue = header;
ResponseArguments Args = svc.AuthenticateCustomer(“user@domain.com”, “password”, false);
This is basically an authentication token for MachPanel API to validate a request generated by a client application. This token shall be assigned to the MachPanelService Object before performing any operation through the API.
The authentication token shall be initialized and assigned authentic credentials to successfully perform an operation through API.
This is a type which contains all the functions and/or functionalities which can be performed through the API. Client application is required to initialize this type, assign it a valid authentication token and then call for a desired functionality with required parameters, as is shown in the above example.